Wednesday, October 30, 2013
Last minute Halloween's stuff! By @themorasmoothie
Are you ready for the most terrifying night of the year?
Kids are all in high spirits , and yesterday, with my sweetheart baby, I made these "last minute" decorations very easy and fast to make. And today I'm going on to arrange the most monstrous party of the year , between decorations and various foodstuffs .
Bats :
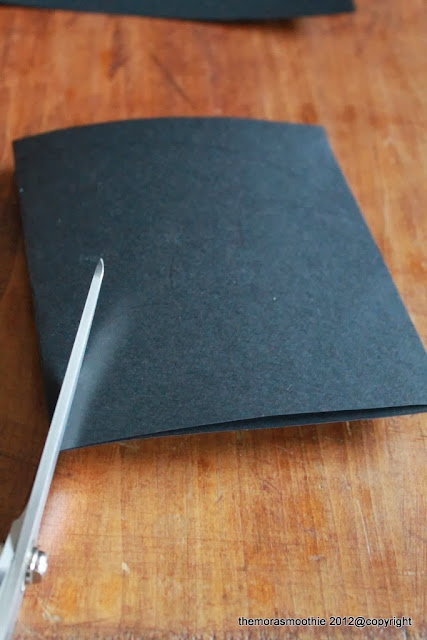
black cardboard , folded in 2 , and then cut into shape ... you just need the string or tape to attach it to the ceiling.
leather gourds:
you who follow me know that I often use leather of recycling , so I used strips of leather attached with copper thread and then I glued the black leather. ( I use them to decorate the table and as a gift for mothers .. . convertible as cuff ) .
The bag :
Cloth cut and then tapped , then I turned around and I applied the handles always with the stapler and then I glued the ghosts that made my baby.
The small house, I could not to publish the step by step, but it is simple pastry.
The gourd is there, even bats, bag for candy too ( we also made ghosts with toilet paper , but they are drying ) , the dress is ... (from Morticia Addams I'm ready ;))
What say... a big kiss and go on with the decorations ...
Ps: I also made a spider ring ... I'll show you next
Siete pronti per la notte più terrificante dell' anno?
I bambini sono tutti su di giri, ed io ieri insieme al mio tesorino ho realizzato queste decorazioni molto facili e veloci da fare all' ultimo momento. Ed oggi continuerò per organizzargli la festa più mostruosa dell' anno, tra decorazioni e cibarie varie.
Pipistrelli:
cartoncino nero, piegato in 2, e poi tagliato in forma... serve solo lo spago o il nastro adesivo per attaccarlo al soffitto.
Zucchette in pelle:
voi che mi seguite lo sapete che uso spesso la pelle di riciclo, così ho usato delle striscie di pelle collegate con del filo di rame e poi ho incollato la pelle nera.( mi serviranno per decorare la tavola e come regalo per le mamme... trasformabile in bracciale).
La borsa:
Panno tagliato e poi spillato, dopo l' ho girato ed ho applicato i manici sempre con la splillatrice e poi ho incollato i fantasmini fatti dal mio bambino.
La casetta, non sono riuscita a fare lo step by step, ma è semplice pasta frolla.
La zucca c'è, pipistrlli anche, borsa per le caramelle anche (abbiamo anche fatto dei fantasmini di cartaigienica, ma stanno asciugando), il vestito c'è... (da Morticia Addams sono già pronta ;) )
Che dire un bacione e continuo con le decorazioni...
Ps: ho anche fatto un anello ragno... ve lo mostrerò
Subscribe to:
Post Comments (Atom)


I love all of your Halloween decorations so much!!! Great job explaining your DIY, you make it so simple and easy...I might have to make some of those bats next year!
ReplyDeletecantbuymelovvve.blogspot.com
che carine decorazioni! l'anno scorso ho comprato qualcosa per Halloween su https://www.homelook.it/ ma forse adesso trovo un po' di tempo per creare qualcosa da sola,grazie per l'ispirazione.
ReplyDelete