Showing posts with label life style blog. Show all posts

Thursday, June 27, 2013

Outfit with Blue DIY ! By @themorasmoothie


Hi everyone, how are you? New day, new outfit with a new Diy, soon will post you the tutorial, ... but try to guess who and what inspired me?
I leave you with these pics, which I hope you enjoy them, a kiss and soon


Ciao a tutti, come va? Nuovo giorno, nuovo outfit con un nuovo Diy, presto posterò il tutorial,... ma provate ad indovinare a chi e a che cosa mi sono ispirata? 
Vi lascio con queste foto, che spero vi piacciano, un bacione e a prestissimo


Follow on Bloglovin

Monday, March 25, 2013

Diy bracelet back & white inspired by Fendi

diy blog


Hi there, today I'm posting the Diy bracelet inspired by Fendi you have seen here ... between the new creations and new projects I almost forgot this Diy!
Very easy I've got the bag of crisps drive, I colored with golden spray and then on I glued the pieces of leather, to create the effect I cut two squares of white leather and from these then I cut the triangles and then from the black stripe I cut the  corresponding triangles.
kiss and see you soon with many new features


Ciao a tutti,  oggi vi posto il Diy del bracciale ispirato a Fendi che avete visto qui...tra le nuove creazioni e nuovi progetti quasi mi dimenticavo di questo Diy!
Molto semplice ho preso il pacco di patatine rigido, l'ho colorato con spray oro e poi sopra vi ho incollato i pezzi di pelle, per creare l' effetto ho tagliato due quadrati di pelle bianca e da questi ho poi tagliato i triangoli e poi dalla striscia nera ho tagliato i triangoli corrispondenti. 
Un bacio e a prestissimo con tante novità


Follow on Bloglovin


Thursday, March 14, 2013

Outfit with my Vintage Diy earrings!

diy


Hi to all my friends, and really thanks everydays I'm realizing that you are growing up as more and more ...how can I thank you? Give me a great charge huge thank you thank you thank you!
Today 's outfit worn yesterday with my vintage style earrings  that you find here (if you have lost) very easy and a great desire to Spring ... will it arrive?!!
Kisses kisses kisses


Ciao a tutti amici miei, e veramente grazie ogni giorno mi accorgo che crescete sempre di più...come non ringraziarvi? Mi date una carica immensa grazie grazie grazie!
Oggi l' outfit indossato ieri con i miei orecchini stile vintage che trovate qui ( se li avete persi) molto easy e con tanta voglia di Primavera...arriverà?!?!
Baci baci baci


Follow on Bloglovin


Monday, March 11, 2013

My new DIY Vintage earrings !

diy fashion


Hey everyone, today's on The Mora Smoothie a new Diy! To make it I was inspired to vintage, are very easy and fast and real effect ... check out to believe.
Now the step by step: I got four leather strips, I stacked two to glue them  and then on one side I colored with golden acrylic, coloring also the edge, then I gave them the form you see ... more easier to make than to explain, I stuck with a hidden part of stapler and I applied the hook, of course after making a hole!
A big kiss to all of you who's following me and I see you growing up more and more ... this make me happy ... thank you thank you thank you


Ciao a tutti, oggi un nuovo Diy! Per realizzarlo mi sono ispirata al vintage, sono molto semplici veloci e di vero effetto...vedere per credere. 
Passiamo allo step by step: ho preso 4 striscie di pelle, ne ho sovrapposte 2 per incollarle e poi da una parte le ho colorate con l' acrilico oro, colorando anche il bordo, poi gli ho dato la forma che vedete...più semplice da fare che da spiegare , le ho bloccate con un punto nascosto di pinzatrice ed ho applicato il gancio, ovviamente dopo aver fatto un foro! 
Un bacione a tutti voi che mi seguite e vi vedo aumentare sempre più...mi rendete felicissima... grazie grazie grazie


Follow on Bloglovin


Friday, March 8, 2013

Diy earrings double face!

diy blog


Hello everyone, today I'm posting  these earrings made ​​with scraps of leather used for the bracelet inspired by Fendi. Do you remember that I told you that I didn't thrown? Well I made these earrings, very easy. I used the advanced pieces, a piece of leather on which glue it to the back, could be called double face, and then I applied the hook for earrings, easy, cool and quick just like I like it. See you soon
Ps: I created this design, and earrings, but you can do anything you want, and shapes ... pyramidal and more ... space to your imagination


Ciao a tutti, oggi vi posto questi orecchini fatti con gli avanzi di pelle usati per il bracciale ispirato a Fendi. Vi ricordate che vi avevo detto che non li avrei buttati? Bene ho fatto questi orecchini, molto semplici. Ho usato i pezzetti avanzati un pezzo di pelle su cui incollarli per il dietro, potrebbero essere chiamati double face, e poi vi ho applicato il gancio per orecchini, semplici e veloci proprio come piace a me. A presto 
Ps: io ho creato questo disegno,e degli orecchini, ma potete fare qualsiasi cosa, e forme... piramidali ed altro... spazio alla vostra fantasia


Follow on Bloglovin


Wednesday, March 6, 2013

Tutorial my Diy bracelet inspired by Fendi S/S 2013

diy blog


Hi there, today I'm posting  the Diy bracelet inspired by Fendi that you saw in yesterday's post
To make is very easy,  it just takes a little patience to cut the pieces of leather ...
I used as a base a pipe chips, my "workhorse" for bracelets, pieces of recycling leather  and then helping me with a piece of paper I cut the leather to obtain the desired effect and then with double-sticker tape I attached  it on the tube, cute is not it?
Ps: do not throw the triangles of leather they  will serve us for the next Diy ... nothing you throw everything is recycled.
A big kiss


Ciao a tutti oggi vi posto il Diy del bracciale ispirato a Fendi che avete visto nel post di ieri. 
Da fare è semplicissimo ci vuole solo un pò di pazienza nel tagliare i pezzi di pelle...
Ho usato come base il tubo di patatine, mio "cavallo di battaglia" per i bracciali, dei pezzi di pelle di reciclo e poi aiutandomi con un pezzo di carta ho tagliato la pelle per ottenere l' effetto desiderato e poi con nastro biadesivo l' ho attaccato al tubo, carino no?

Ps: non buttate i triangoli di pelle ci serviranno per un prossimo Diy...nulla si butta tutto si ricicla. 
Un grosso kiss


Follow on Bloglovin


Friday, March 1, 2013

Diy leopard bracelet!

the mora smoothie


Hi my fiends, here I'm with a new Diy. In this time I may be a little set for leopard! It was a while I was trying to create this effect, but before I had used the wrong material. Now, back to this diy, I used 3 strips of black leather that I colored with golden spray, but on two  I put before pieces of tape sticker. After drying, I removed them and I got this leopard effect, then I joined them with hooks and in one of  two leopard I spent enamel dark brown to differentiate it. What do you think about? The leopard was here!! Kisses and the see yea next episode.


Eccomi con un nuovo Diy. In questo periodo mi sono forse un pò fissata per il leopardato! Era da un pò che cercavo di creare quest' effetto, ma prima avevo sbagliato il materiale di base. Ora tornando a questo diy ho usato 3 striscie di pelle nera che ho colorato con lo spray oro, ma su 2 ho messo prima dei pezzetti di nastro adesivo. Dopo l'asciugatura li ho rimossi ed ho ottenuto quest' effetto leopardato, poi li ho uniti con dei gancetti e su uno dei 2 leopardati ho passato dello smalto marrone scuro per differenziarlo. Che ne dite? Il leopardo c'è?!?! Bacioni ed alla prossima puntata.


Follow on Bloglovin


Tuesday, February 26, 2013

My Diy necklace inspired by Isabel Marant Spring/Summer 2013

diy necklace


Hi my friends, today I'm posting the Diy of this necklace made from recycled stuff. What is it? Who has a dog may have understood, you know the rolls of eco-bags for dogs? Inside there is this piece of plastic. So back to us and to our tutorial, I got these cylinders I have colored with golden spray and then I joined them with a golden wire, then I put a golden bead  to lock and then the closer, and the most nice thing is that I have inspired from the necklace's Isabel Marant Spring Summer 2013 fashion shows, what do you think about?
  : *: *: *


Ciao a tutti, oggi vi posto il Diy di questa collana realizzata con materiali di riciclo. Cosa sono? Chi ha un cane forse l'ha già capito, avete presente i rotoli di bustine per i cani? All' interno c'è questo pezzo di plastica. Allora tornando a noi ed al nostro tutorial, ho preso questi cilindri li ho colorati con lo spray oro e poi li ho uniti con del filo di ferro dorato, poi vi ho messo una perlina dorata per bloccare e poi la chiusura, e la cosa più carina è che mi sono ispirata alla collana di Isabel Marant delle sfilate Primavera Estate 2013, che ne dite?
 :*  :*  :*


Follow on Bloglovin


Sunday, February 24, 2013

Diy leopard necklace

diy necklace


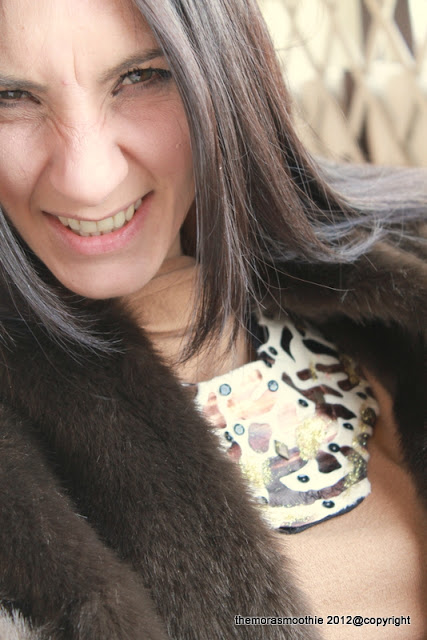
Hi there, today I'm posting the Diy leoprad necklace worn  here. It 's  a not perfect reconstruction of the step by step. To make it  I used a piece of leopard fabric where I drew the shape of the necklace, then I cut and I glued the black sequins, then I glued the adhesive studs passing with a hot iron, and finally to give the light touches I put golden glitter . After I glued the black fabric and ribbon as closure. What do you say about? I hope it's easy to understand, a great big kiss and see you soon


Ciao a tutti, oggi vi posto il diy della collana leopardata indossata qui. E' una ricostruzione non proprio perfetta dello step by step. Per realizzarla ho usato un pezzo di tessuto leopardato dove ho disegnato la forma della collana, poi l'ho ritagliato ed ho incollato delle paillettes nere, poi ho incollato le borchie adesive passandole con il ferro caldo, infine per dare dei tocchi di luce ho messo dei glitter dorati. Dopo ho incollato del tessuto nero e il nastro come chiusura. Che ne dite, spero si capisca abbastanza, un bacione grande e a presto


Follow on Bloglovin

Thursday, February 21, 2013

Diy t-shirt inspired by Burberry Prorsum for man

diy blog


Hi everyone, today I'm posting  the Diy about a T-shirt men, to make it I was inspired by Burberry Prorsum. I got an old t-shirt, which to be honest was also stained, then I created the strips with masking tape to protect the not colored side, and then mixing the color blue with gold metallic acrylic, I added the fixative for tissues and started to paiting. Et voila t-shirt is ready! To me, but especially to my man it was loved very much, what do you think about? See you soon


Ciao a tutti, oggi vi post il Diy di una T-shirt da uomo, per farla mi sono ispirata a Burberry Prorsum. Ho preso una vecchia t-shirt, che a dire la verità era anche macchiata, poi ho creato delle striscie con il nastro adesivo di carta, per proteggere la parte da non colorare, e poi miscelando il colore blue con l'oro metallizzato acrilici, vi ho aggiunto del fissante per tessuti ed ho iniziato a spennellare.Et voilà la t-shirt è pronta! A me, ma soprattutto al mio lui è piaciuta tantissimo, voi che ne dite? A presto


Follow on Bloglovin


Wednesday, February 20, 2013

The outfit is blowing in the wind....!

diy blog


Hi my friends, today I'm posting the outfit about yesterday, done for the case. I was dressed like that and my husband tells me "why we do not takepics?", the necklace is too nice... and now I have to find the step by step about the necklace made ​​some time ago but I still had to test it. A big kiss to all and see you soon


Ciao amici, oggi vi posto l'outfit di ieri, nato per caso. Ero vestita così e mio marito mi dice perchè non facciamo delle foto?, è troppo bella quella collana...ed ora devo cercare lo step by step della collana fatta qualche tempo fa ma dovevo ancora testarla. Un bacione a tutti e a presto


Follow on Bloglovin


Wednesday, February 13, 2013

Gift-card for Valentine's day!

life style blog


Hello everyone, today I'm posting a gift-card to make find to your love on Valentine's Day ... and, why not every day that you want with a different phrase, just change the gift-card ...
You need to get any red construction paper, divide it into 3 equal parts, in one of them you  writte LOVE, and then with the help of the cutter carves obviously leaving the bottom attached, and on a white card you can write your special phrase, what do you think?
Ps: For this idea I was inspired by the post of Ilenia, I liked her gift-card  very much, so I decided to make one in my interpretation. kisses kisses


Ciao a tutti, oggi vi posto un biglietto da far trovare al vostro Amore il giorno di S.Valentino... e perchè no anche ogni giorno che volete con una frase diversa, basta cambiare il bigliettino...
Bisogna procurarsi, del cartoncino rosso, dividerlo in 3 parti uguali, su una di esse si scrive LOVE, e poi con l'aiuto del taglierino si ritaglia lasciando ovviamente la parte bassa attaccata, e su un cartoncino bianco potete scrivere la vostra frase speciale, che ne dite?
Ps: per questa idea mi sono ispirata al post di Ilenia, il suo bigliettino mi è piaciuto veramente tanto e così ho pensato di farne uno a mia interpretazione. Baci Baci


Follow on Bloglovin