Good morning guys, are u ready for a new DIY?
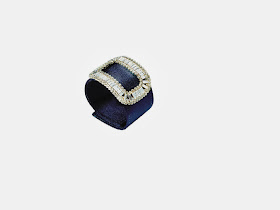
The new DIY bracelet of today is, you can't belive, inspired by Roger Vivier.
It was a while that I got the idea to make it and then with a piece of satin in my hand all came on their own.
TIME: 20 min
ESSENTIAL: satin, strongly for bags, stick beads (WholePort), Swarovski, glue and buttons for closure.
TUTORIAL: I cut a piece of "strongly for bags" for the size of my wrist, then I cut from satin the fabric needed to cover it.
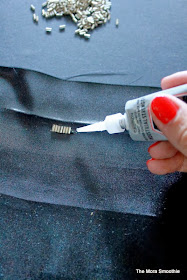
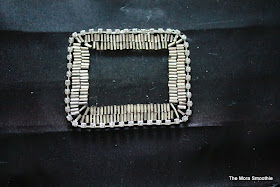
I glued the stick beads to stick and then the Swarovski, as in the pic, then I inserted and glued to the "srongly for bag" right to give rigidity to the cuff, but leaving satin free to apply the closures.
Finally I applied the pressure buttons, but you could also put some decorative buttons or clips (poppers)... have fun.
What do you think about?
A big big kiss and the next time!
Buongiorno, pronti per un nuovo DIY?
Il nuovo bracciale DIY di oggi e niente di meno che ispirato a Roger Vivier.
Era da un pò che miravo alla sua realizzazione e poi con un pezzo di raso in mano tutto è venuto da sè.
TEMPO: 20 min
NECESSARIO: raso, rigidino per borse, perline a bacchetta (WholePort), Swarovski, colla e bottoni per chiusura.
TUTORIAL: Ho tagliato un pezzo di rigidino per borse della misura del polso, ho poi tagliato dal raso il tessuto necessario per ricoprirlo.
Ho incollato le perline a bacchetta e poi gli Swarovski, come da foto, poi ho inserito ed incollato il rigidino proprio per dare rigidità al bracciale, però lasciando del raso libero per applicarvi le chiusure.
Infine ho applicato i bottoni a pressione, ma potreste anche mettere dei bottoni gioiello o delle clip(bottoni automatici), a voi il divertimento.
Che ne dite?
Un bacione grande grande ed alla prossima puntata!


Fantastico questo DIY!! Ti va di seguirci a vicenda?
ReplyDeleteel y ella fashion
el y ella fashion bloglovin